
NOTE
- The tutorial requires at least a basic knowledge of the Adobe Photoshop Software.
- Right-Click on the pictures and “open link in a new tab” to see the high-definition images.
Step 1:
Chose a stimulating background.
Your background should be interesting, but it should not attract anymore attention than your subject itself. Choose something subtle, avoid flashy colors such as purple, pink, yellow…….you get my drift. Right?
Step 2:
Setup your Camera.
I originally used a Sony Alpha 58 with a tripod for this particular project but I suppose you can easily get it done with a steady spot instead of a tripod and a mobile camera with a decent picture quality. (No, I am not exaggerating!!!!!)
Ask your subject (in this case, my childhood friend Vibhuti. Hi! Vibhu, if you’re reading this  ) to stand in the designated place while you set up the focus of the camera. Try to set the aperture in the lower range. Remember to not disturb the position of the camera after you’ve set it up because you’ll be needing like a million photos from the same position.
) to stand in the designated place while you set up the focus of the camera. Try to set the aperture in the lower range. Remember to not disturb the position of the camera after you’ve set it up because you’ll be needing like a million photos from the same position.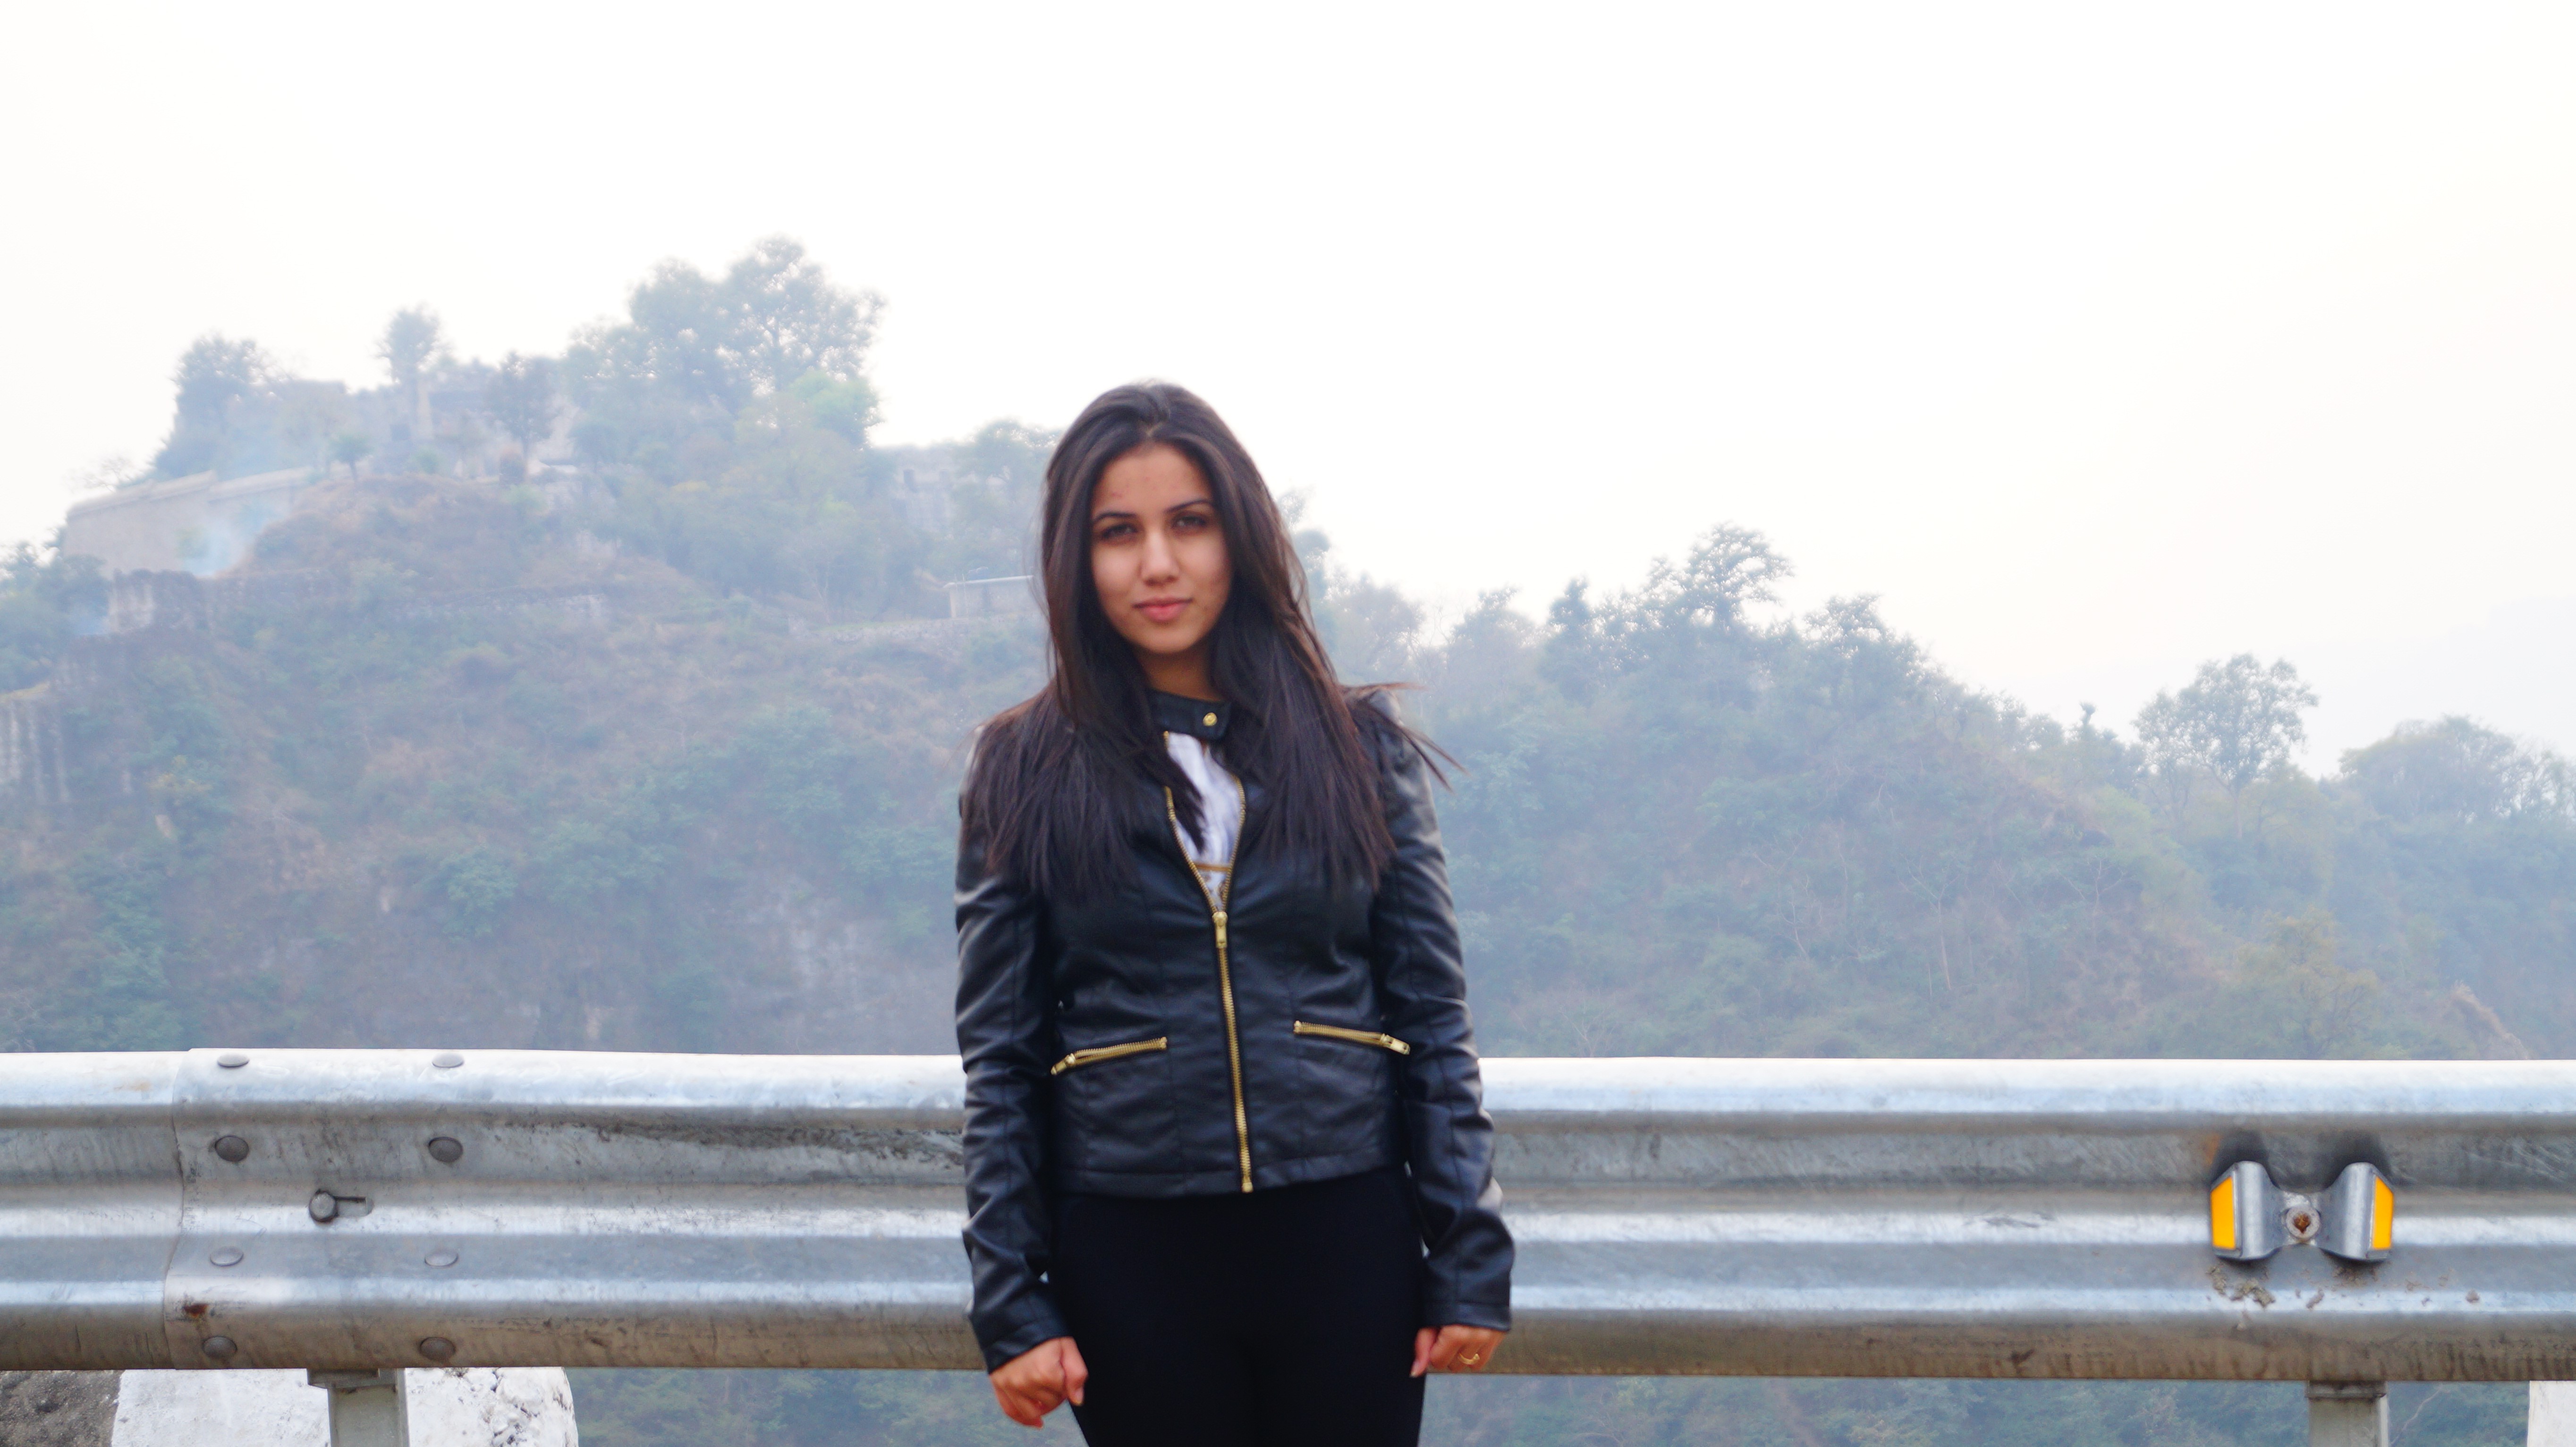
Step 3:
Shoot!Shoot!Shoot!
If you’re still with me by now, here comes the fun part now. Most of these photos you take now will form the basis of the Photoshop work you’ll be doing later. Try to get a lot of photos for easier manipulation.
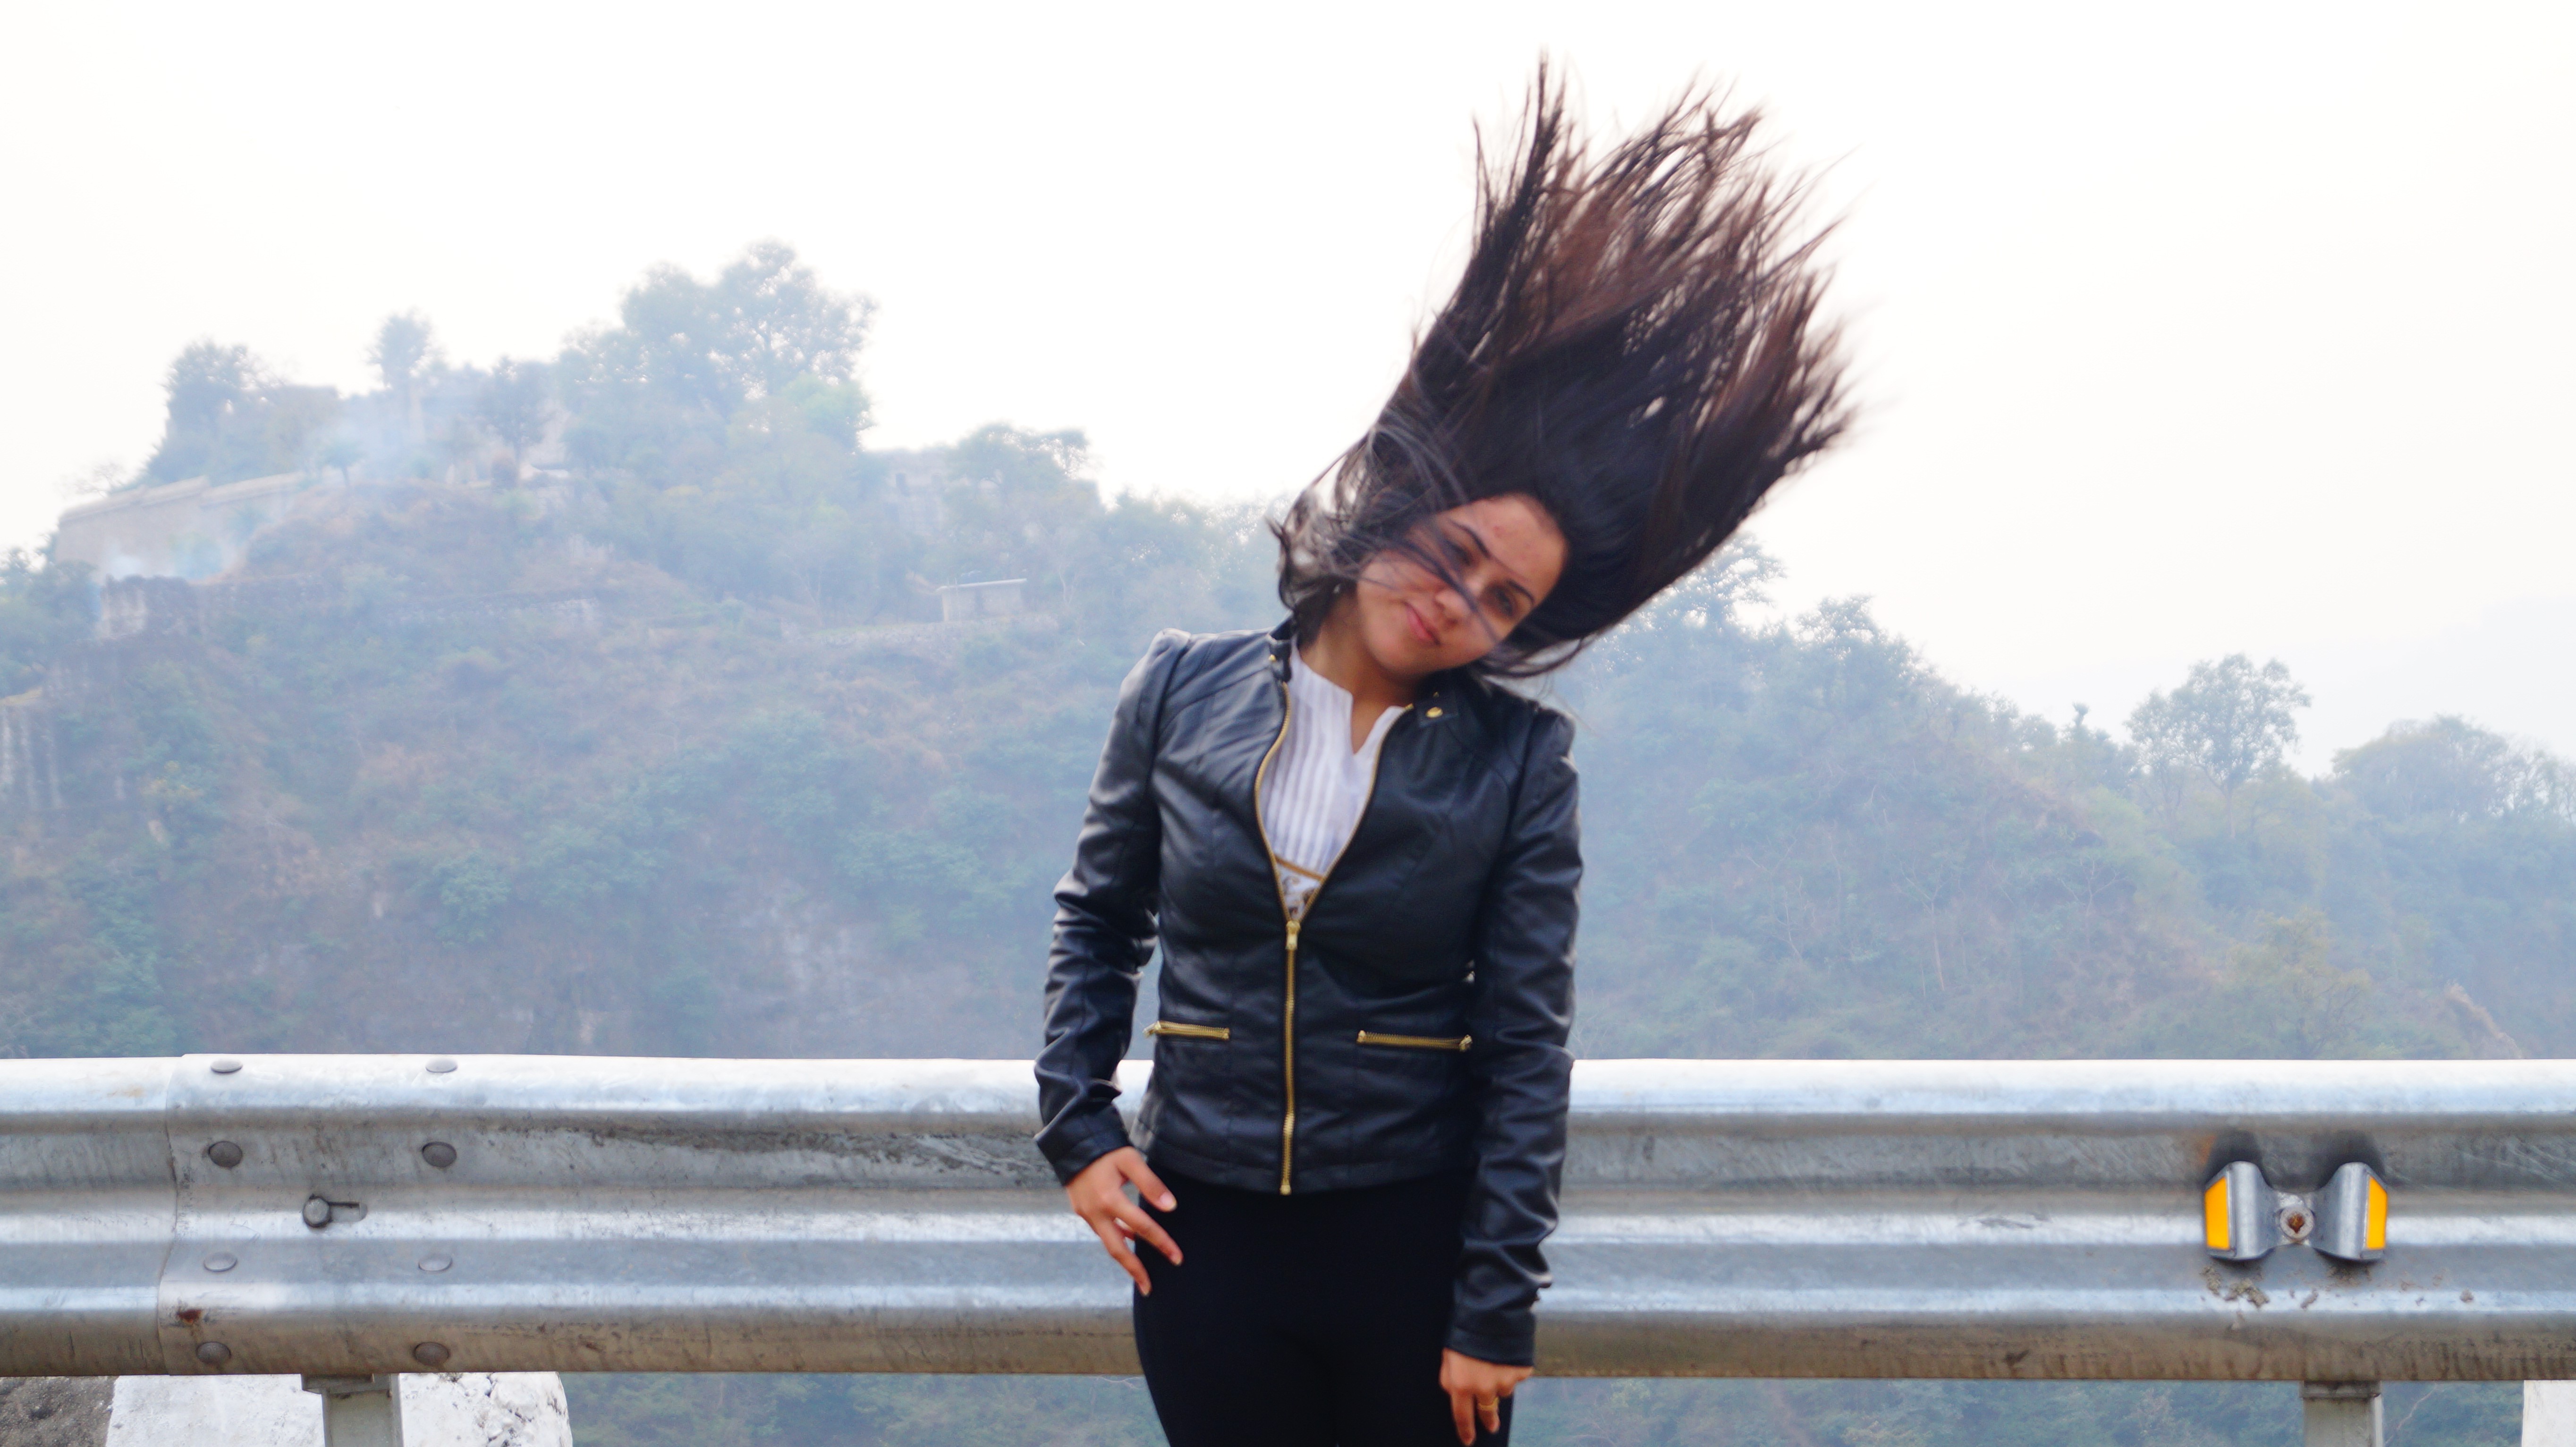
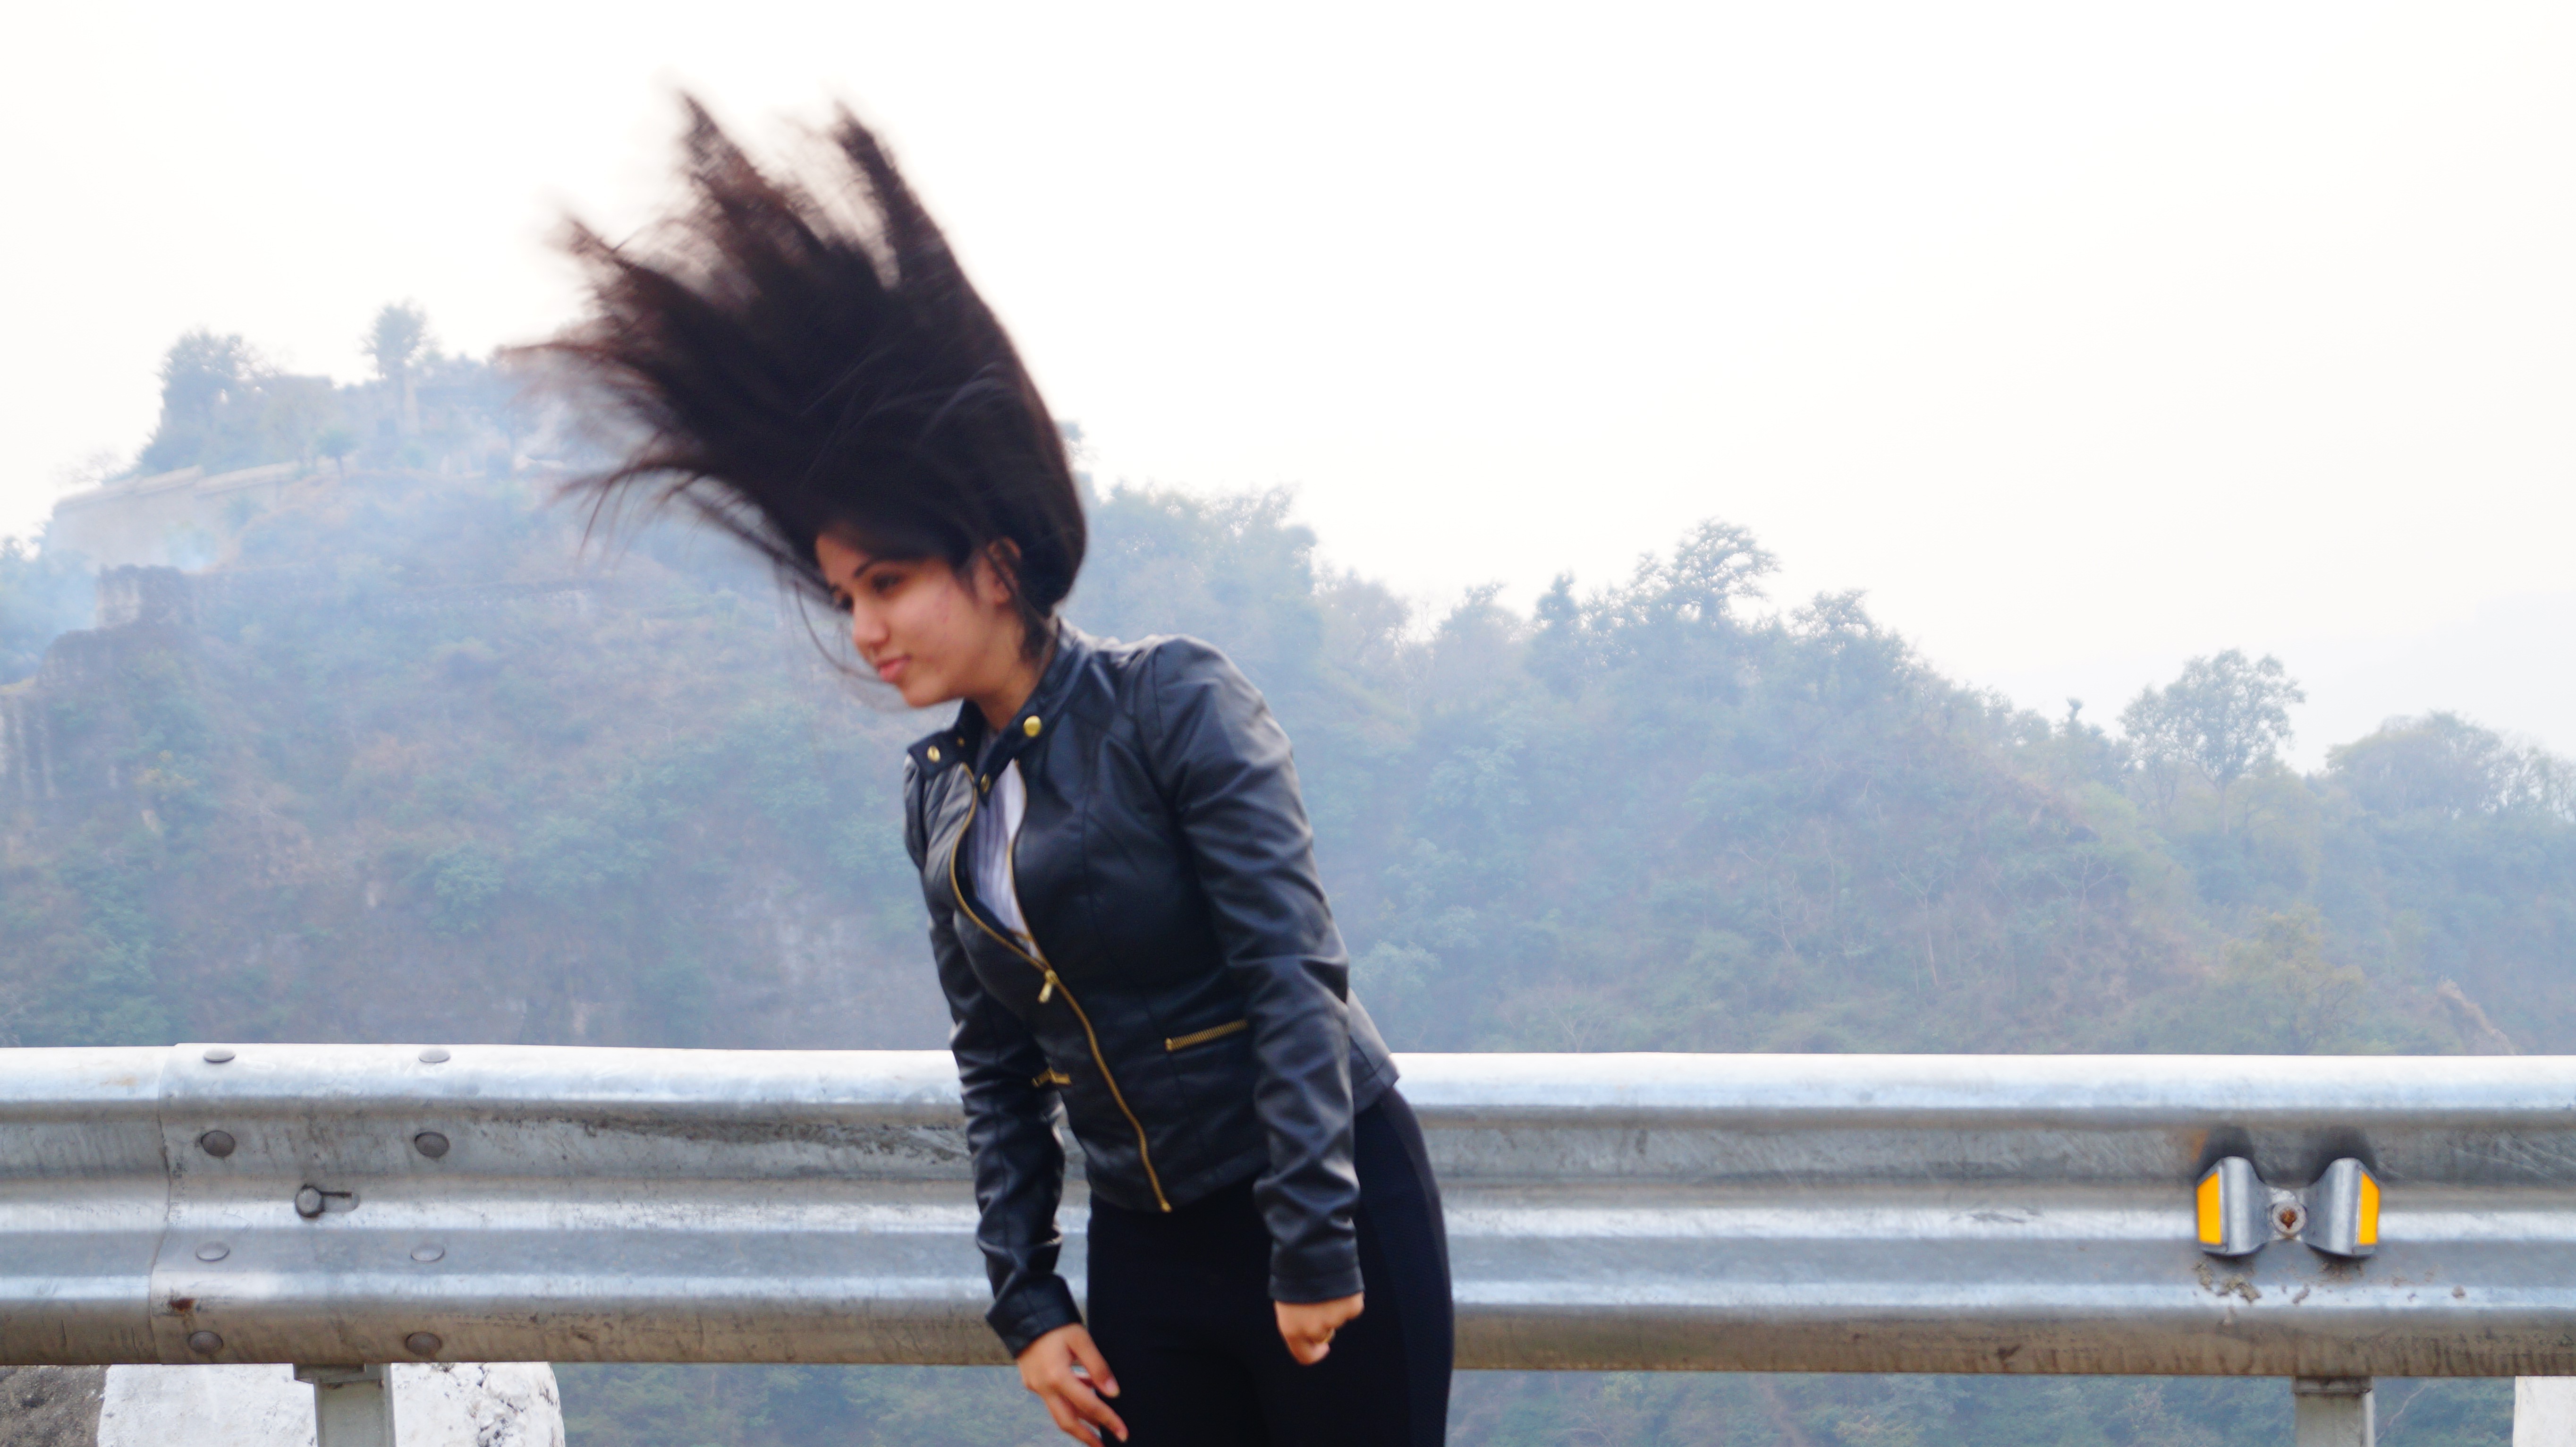
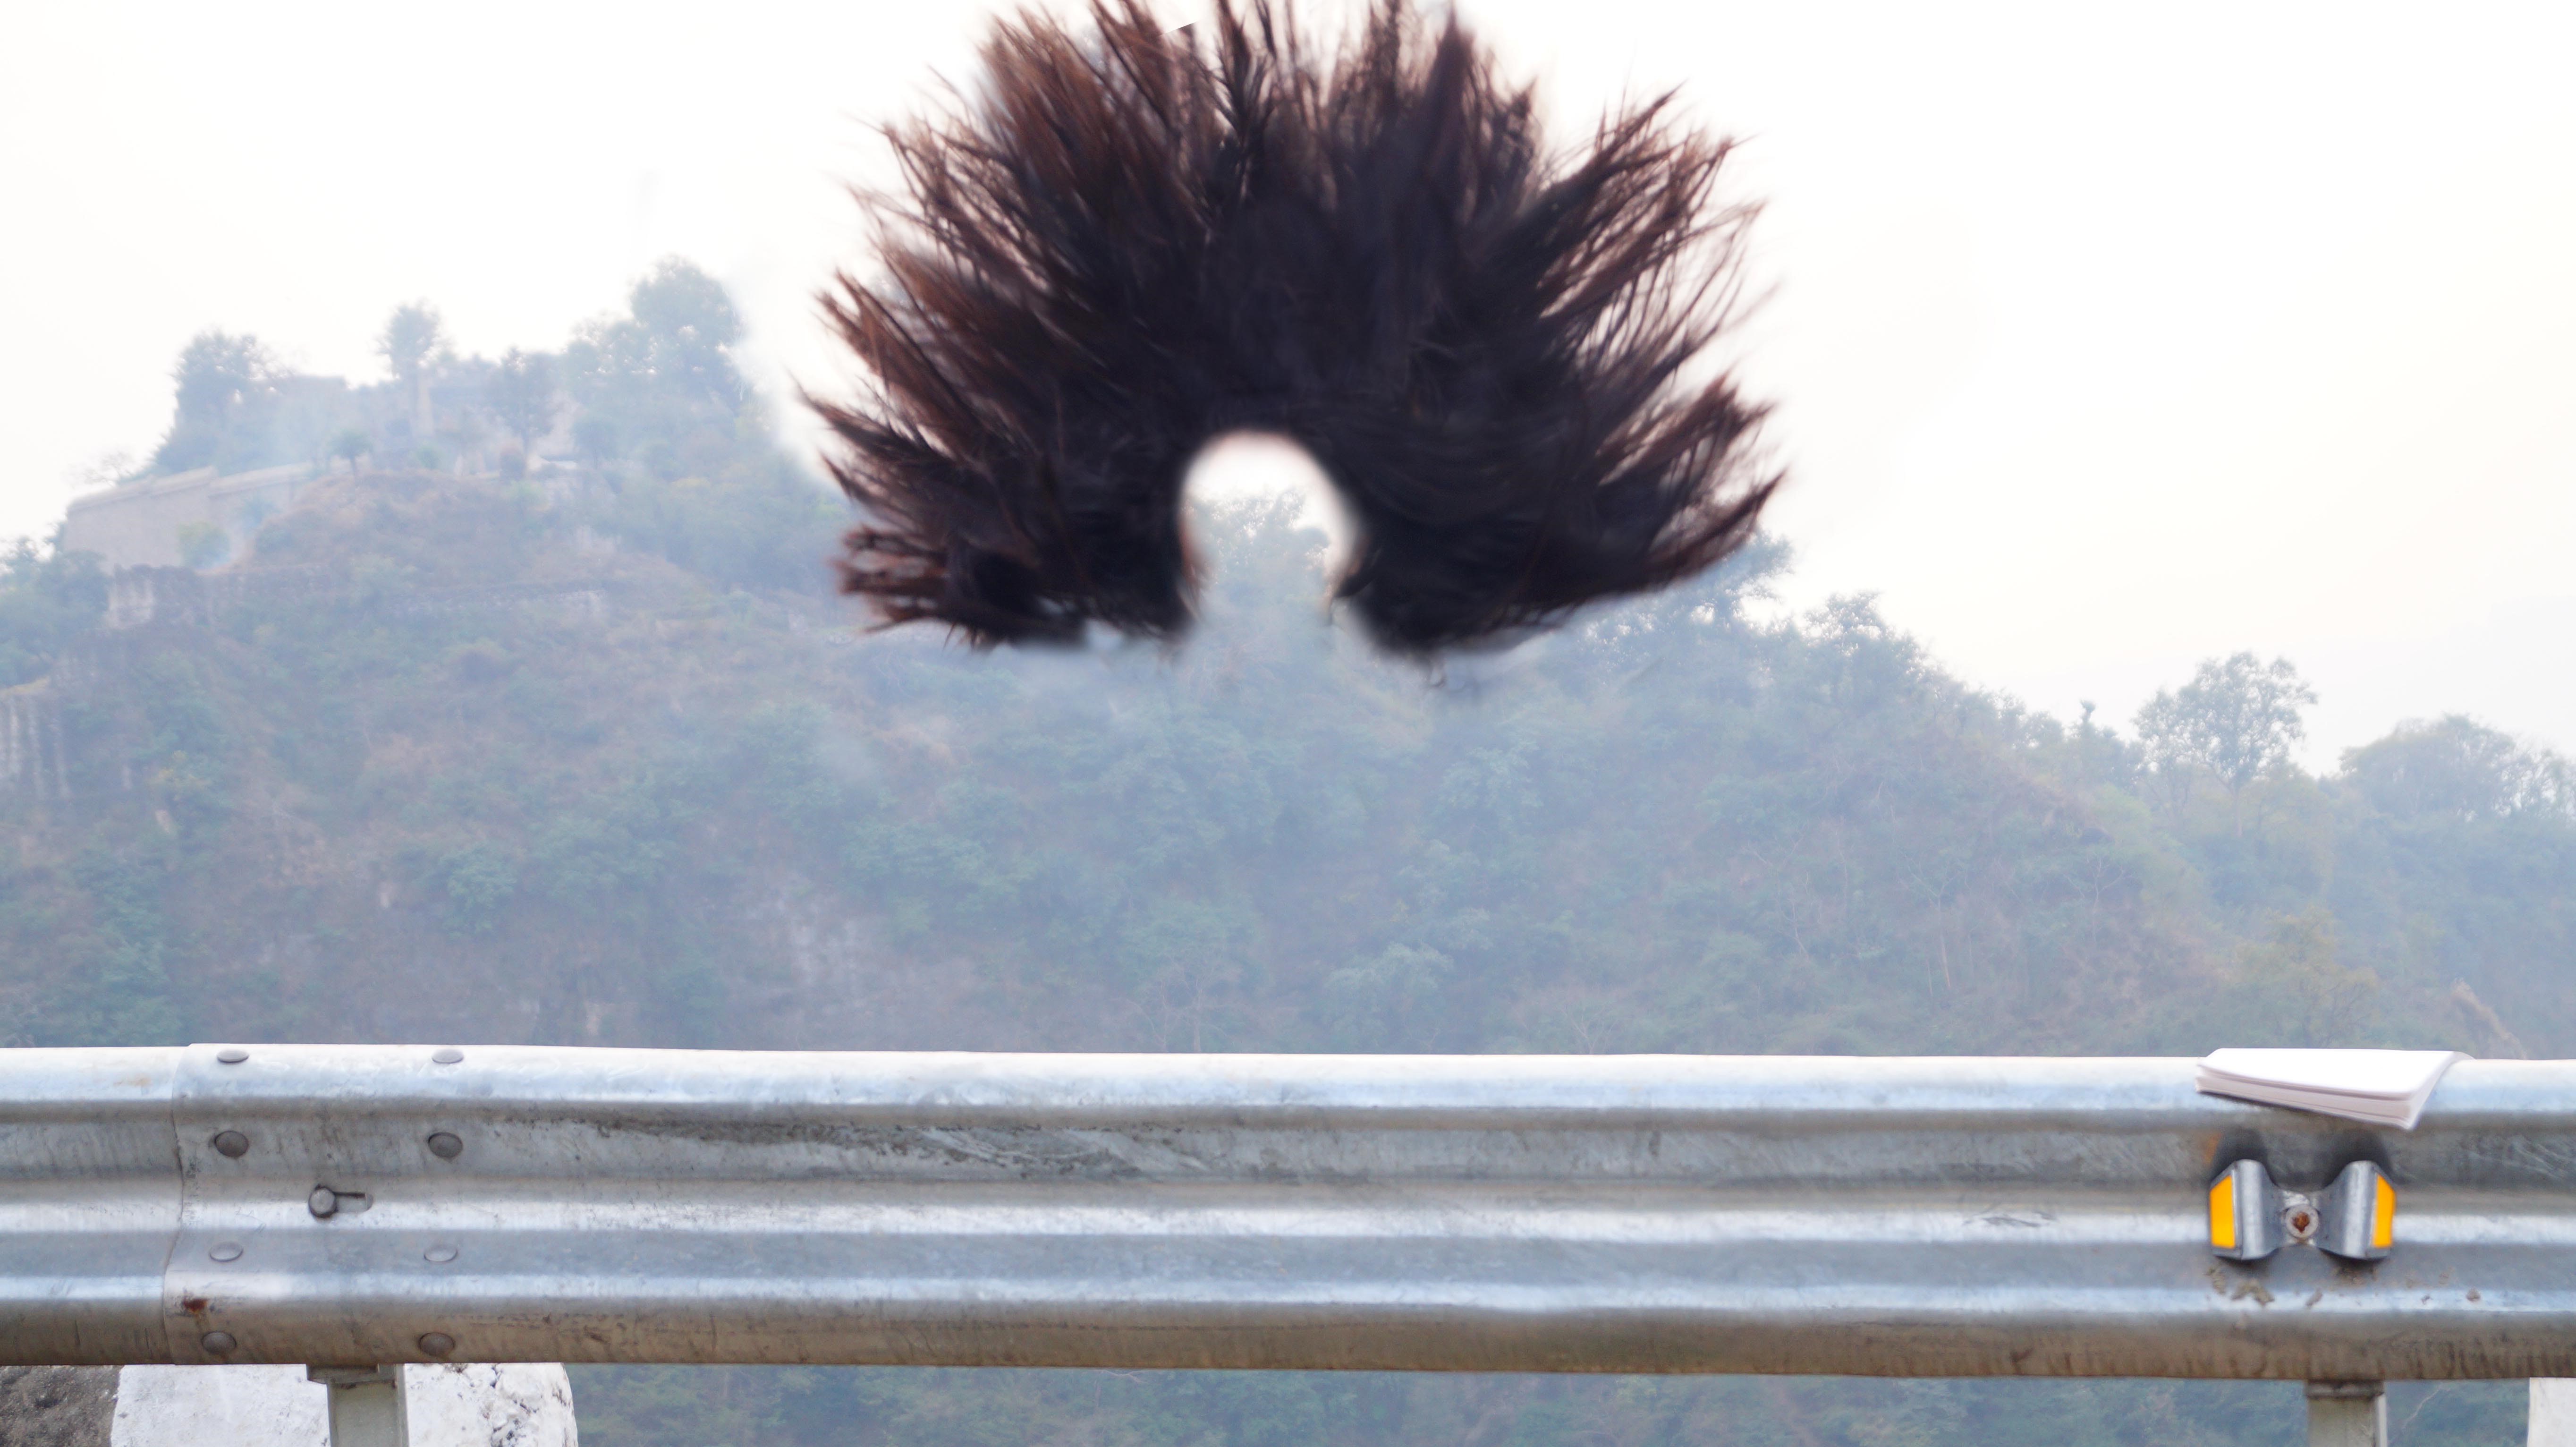
The trick is to make it seem the hair is almost flying in the air.Set the shutter speed on your camera to really, really fast so you can get every minute detail of the hair.(Try not to get blurry hair). Shoot a lot of photos of hair in all the directions to form a major bulk of the hair later via Photoshop.
I hope by now you’d have a clear idea of what I meant.
Now ask model to raise the hair with the help of her hands.This is the important part, if the hair rests on the shoulders in the final image, the whole picture will look very unnatural.
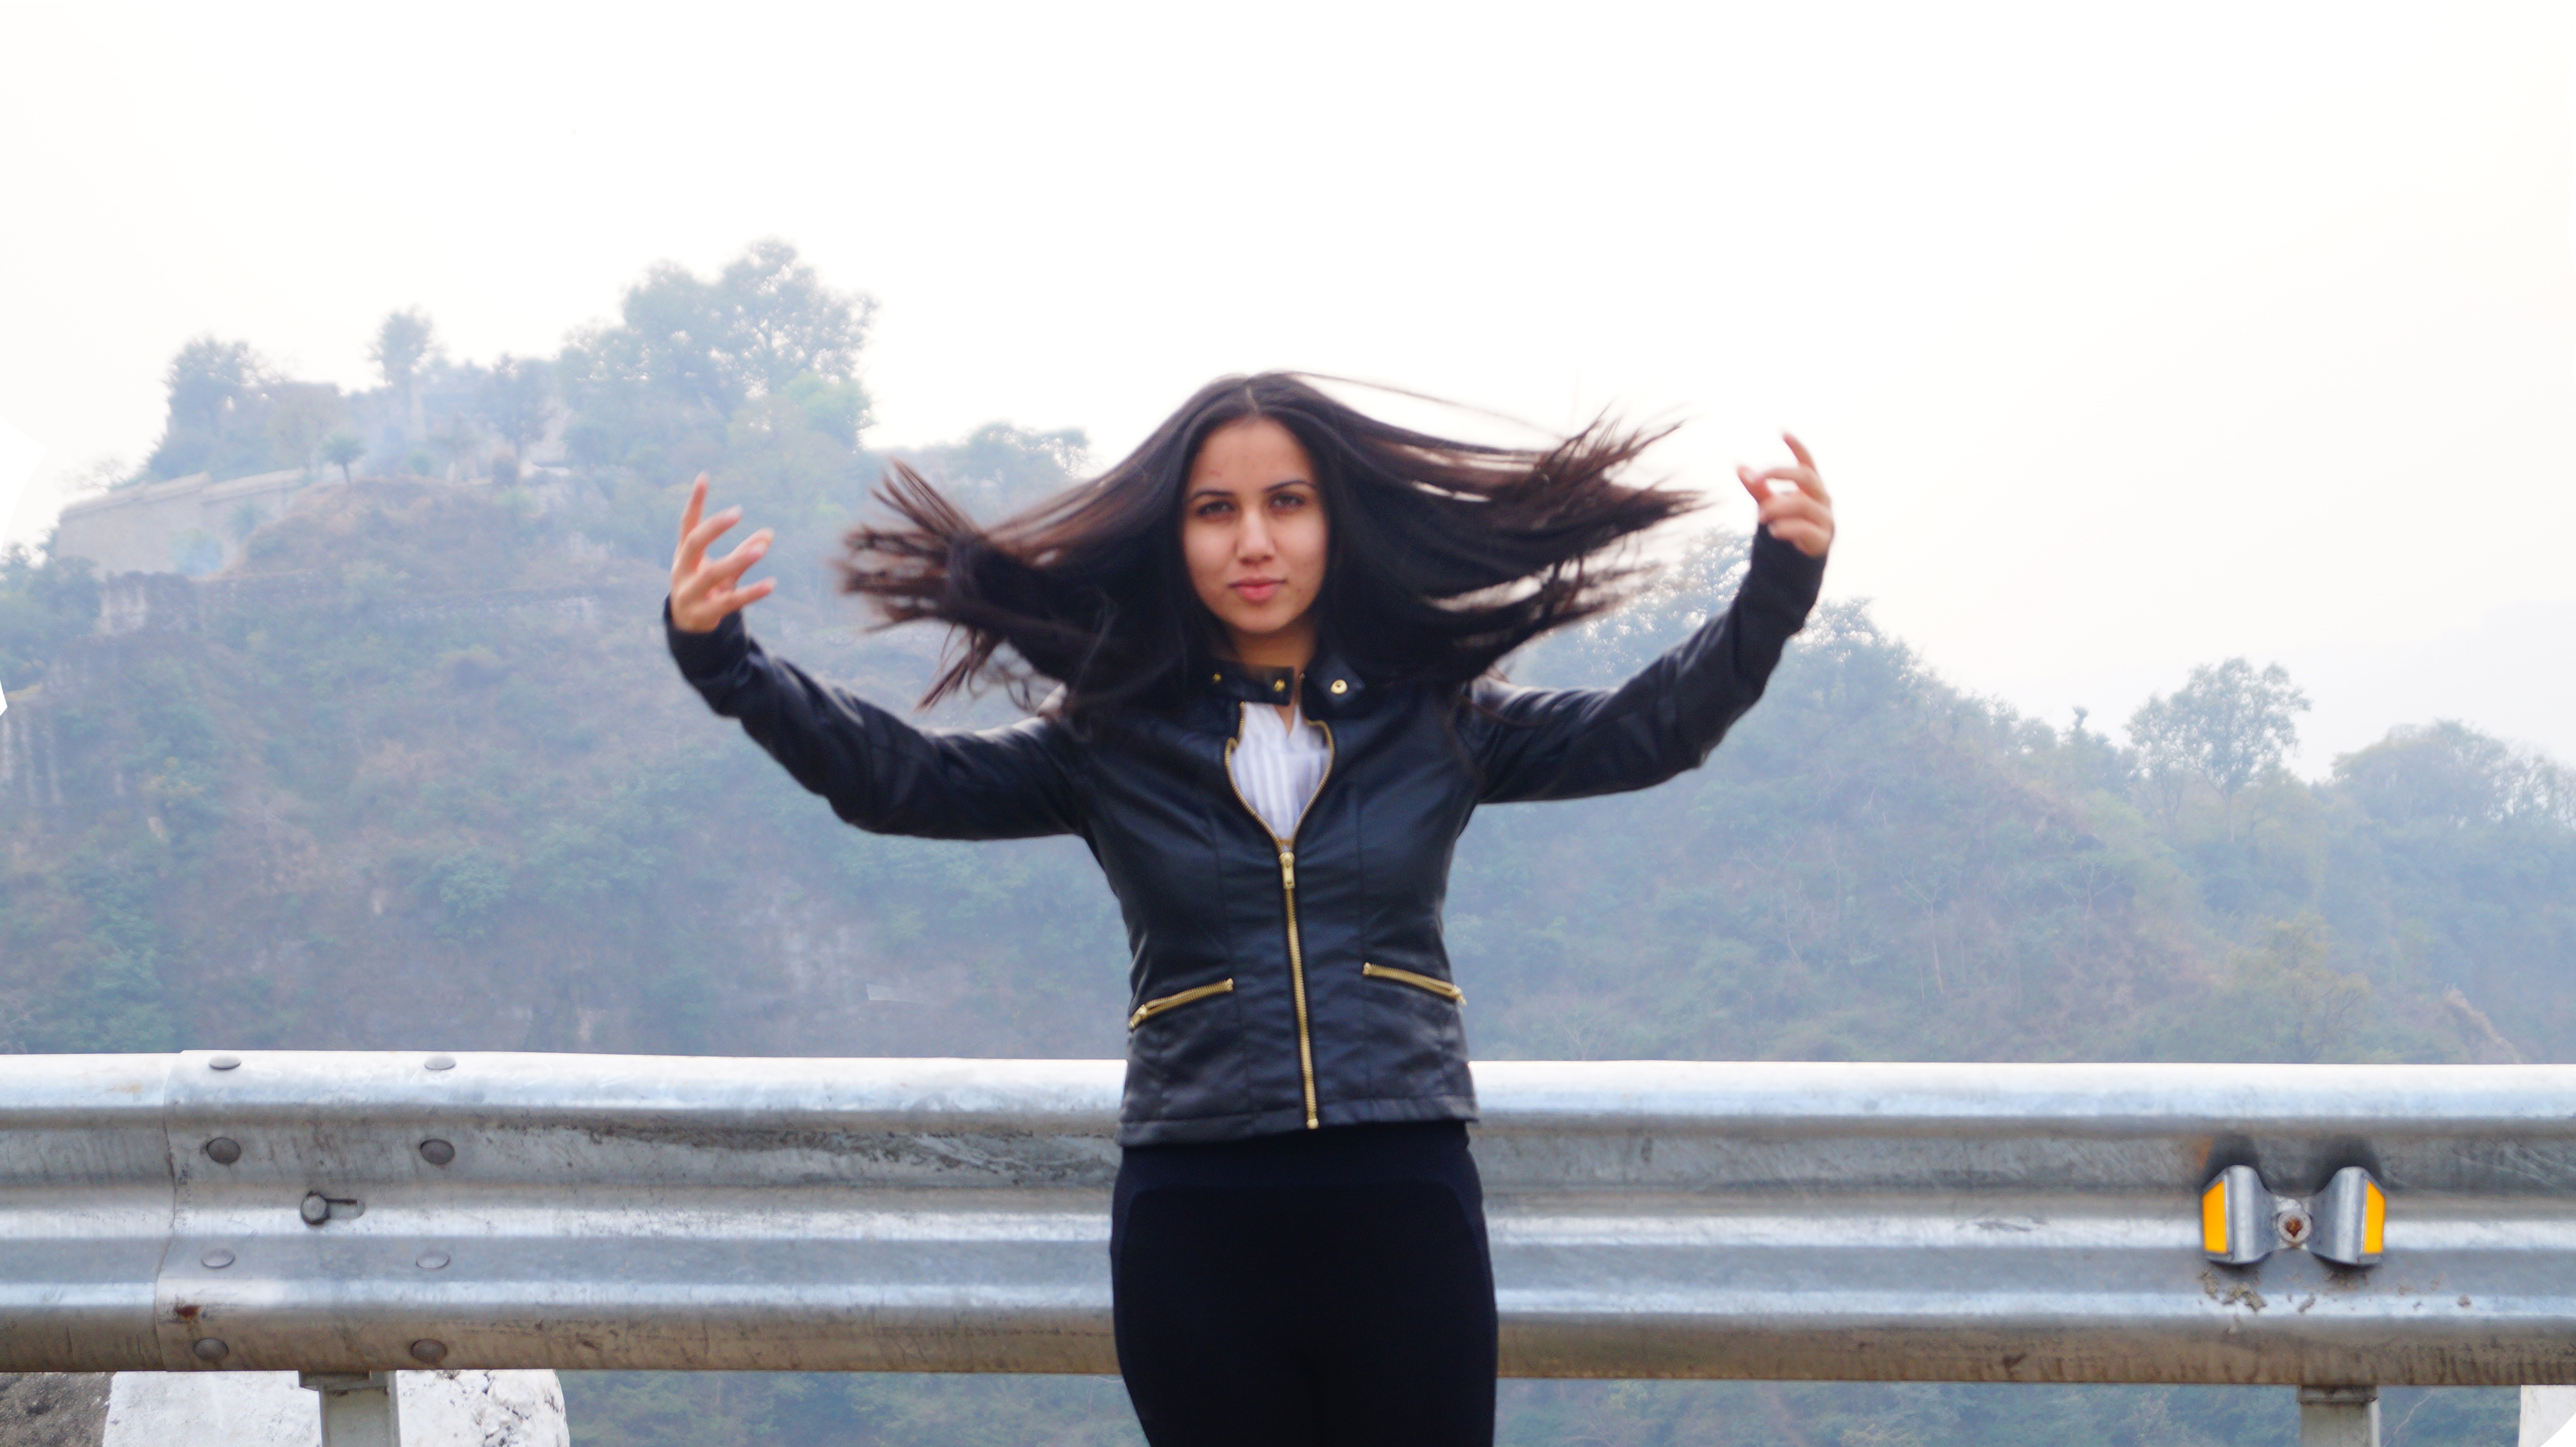
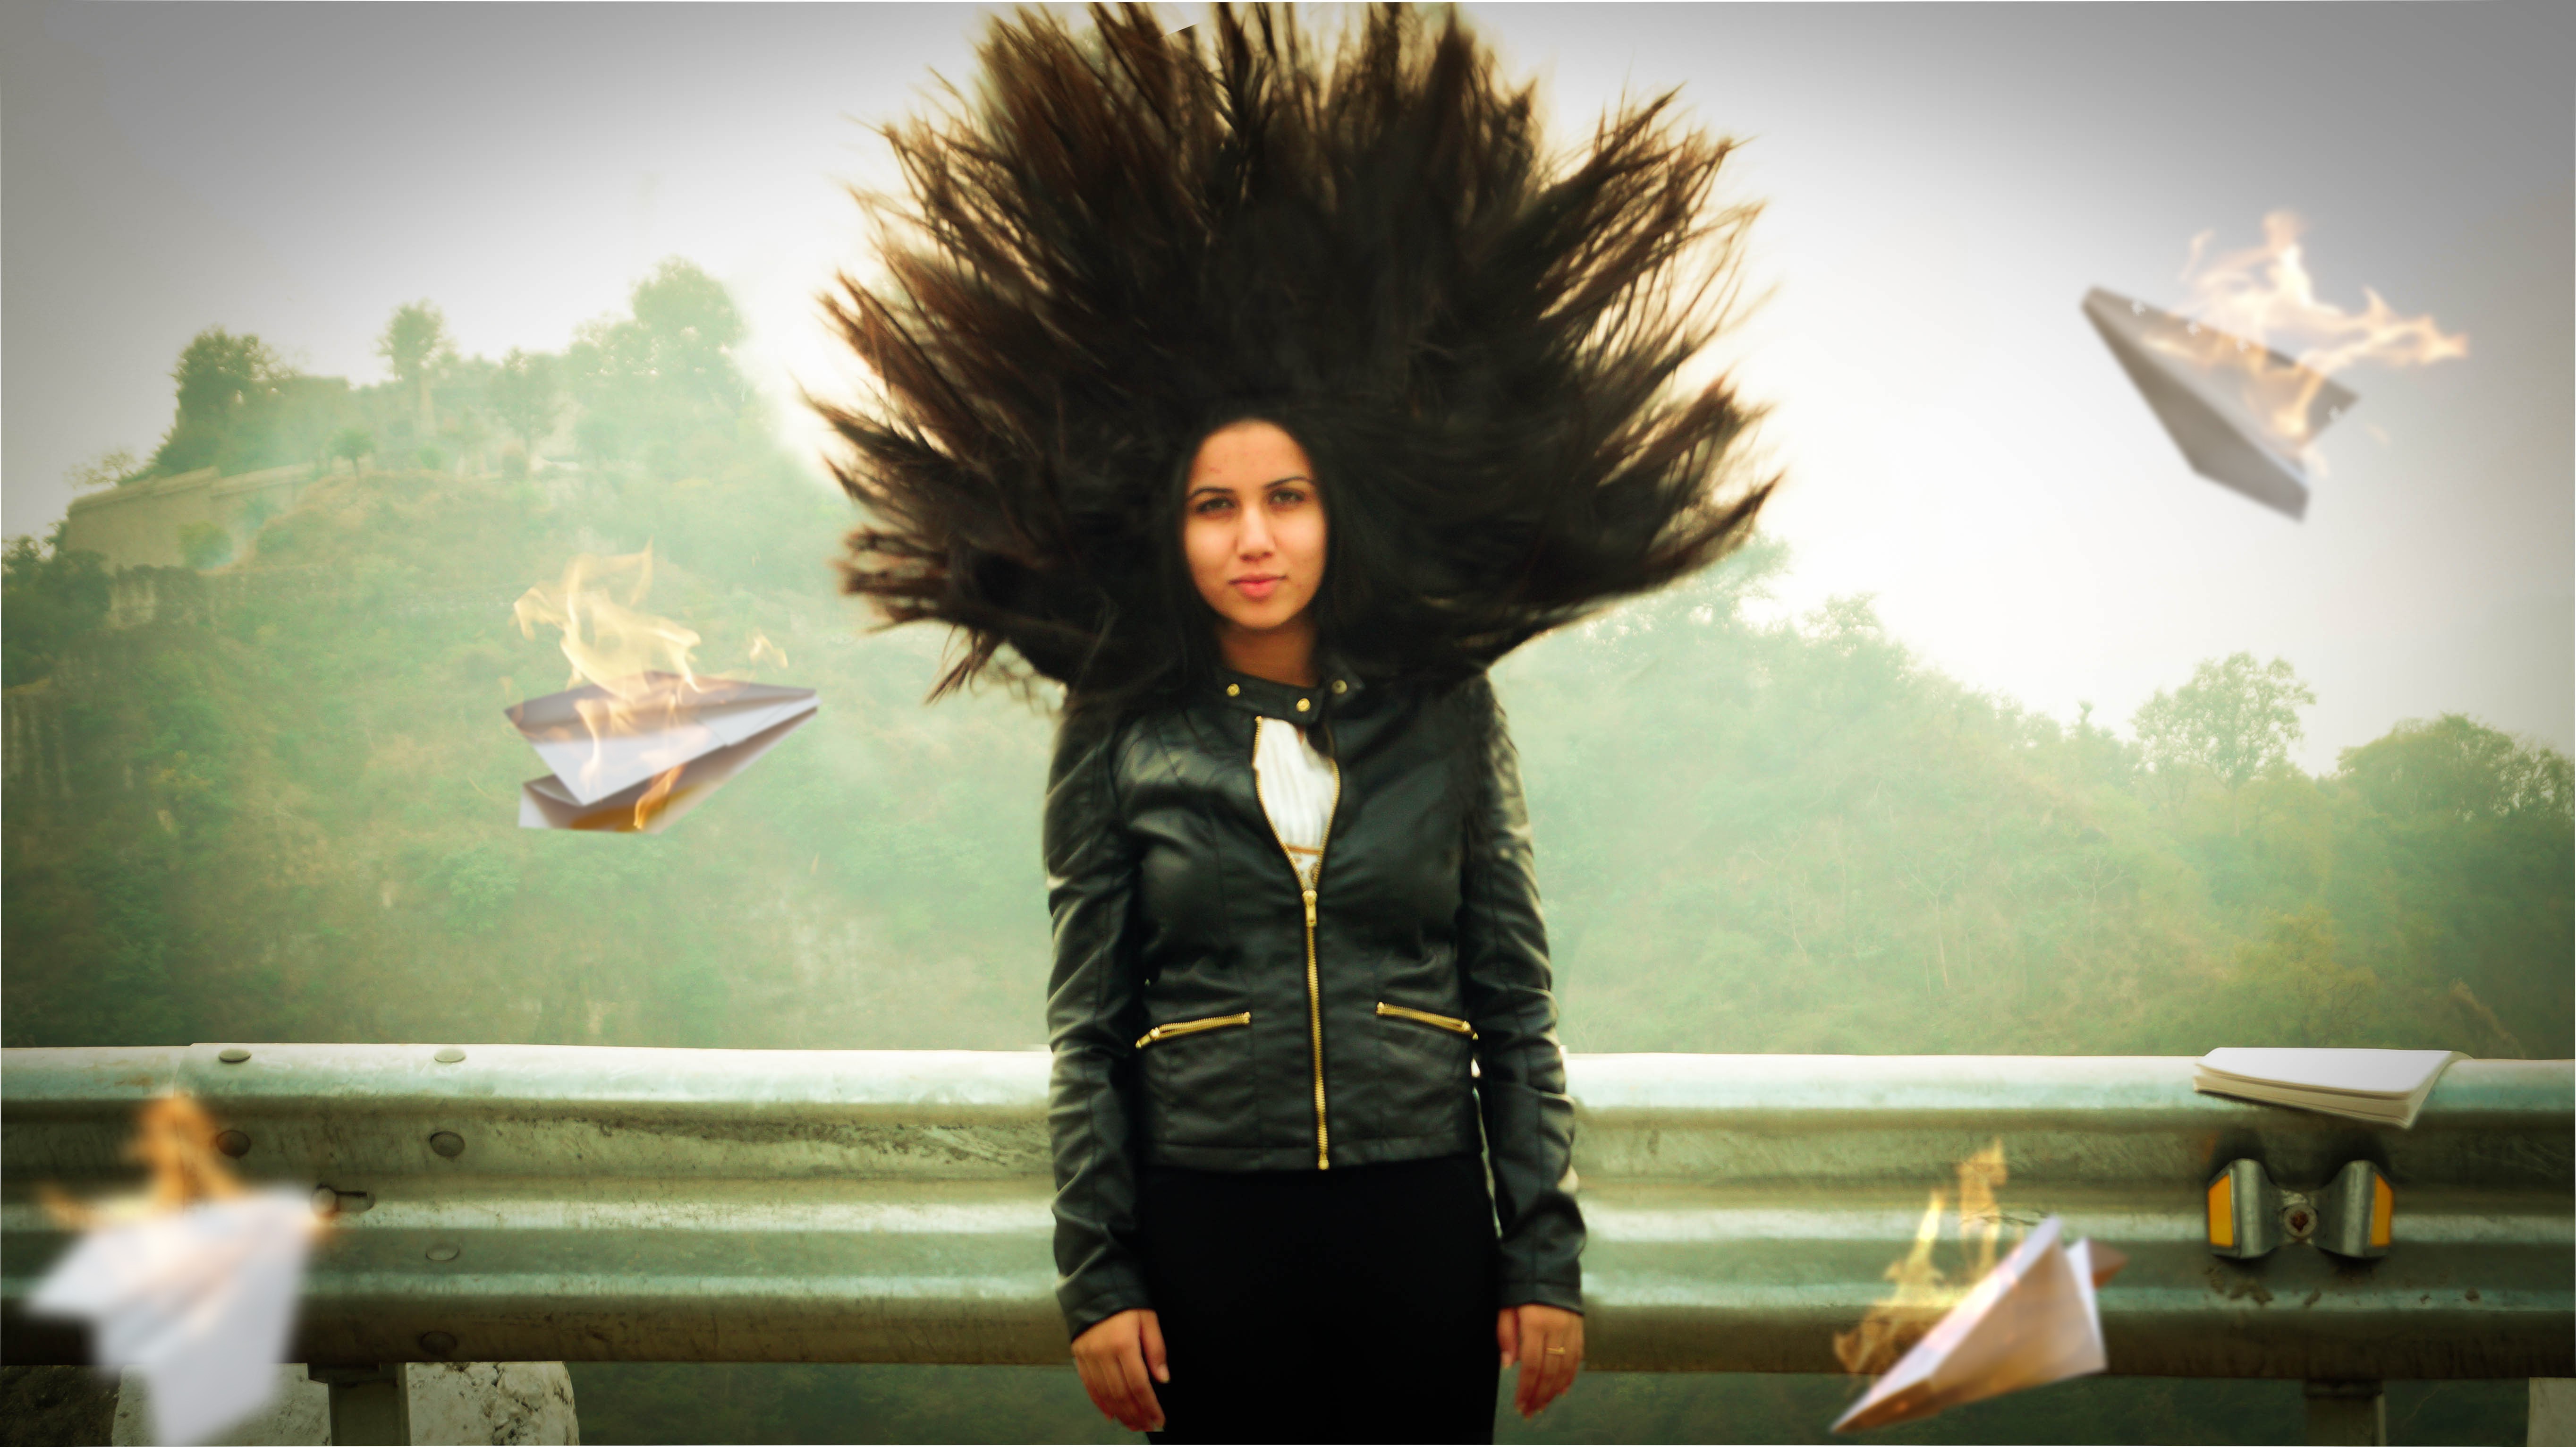
IMAGE A
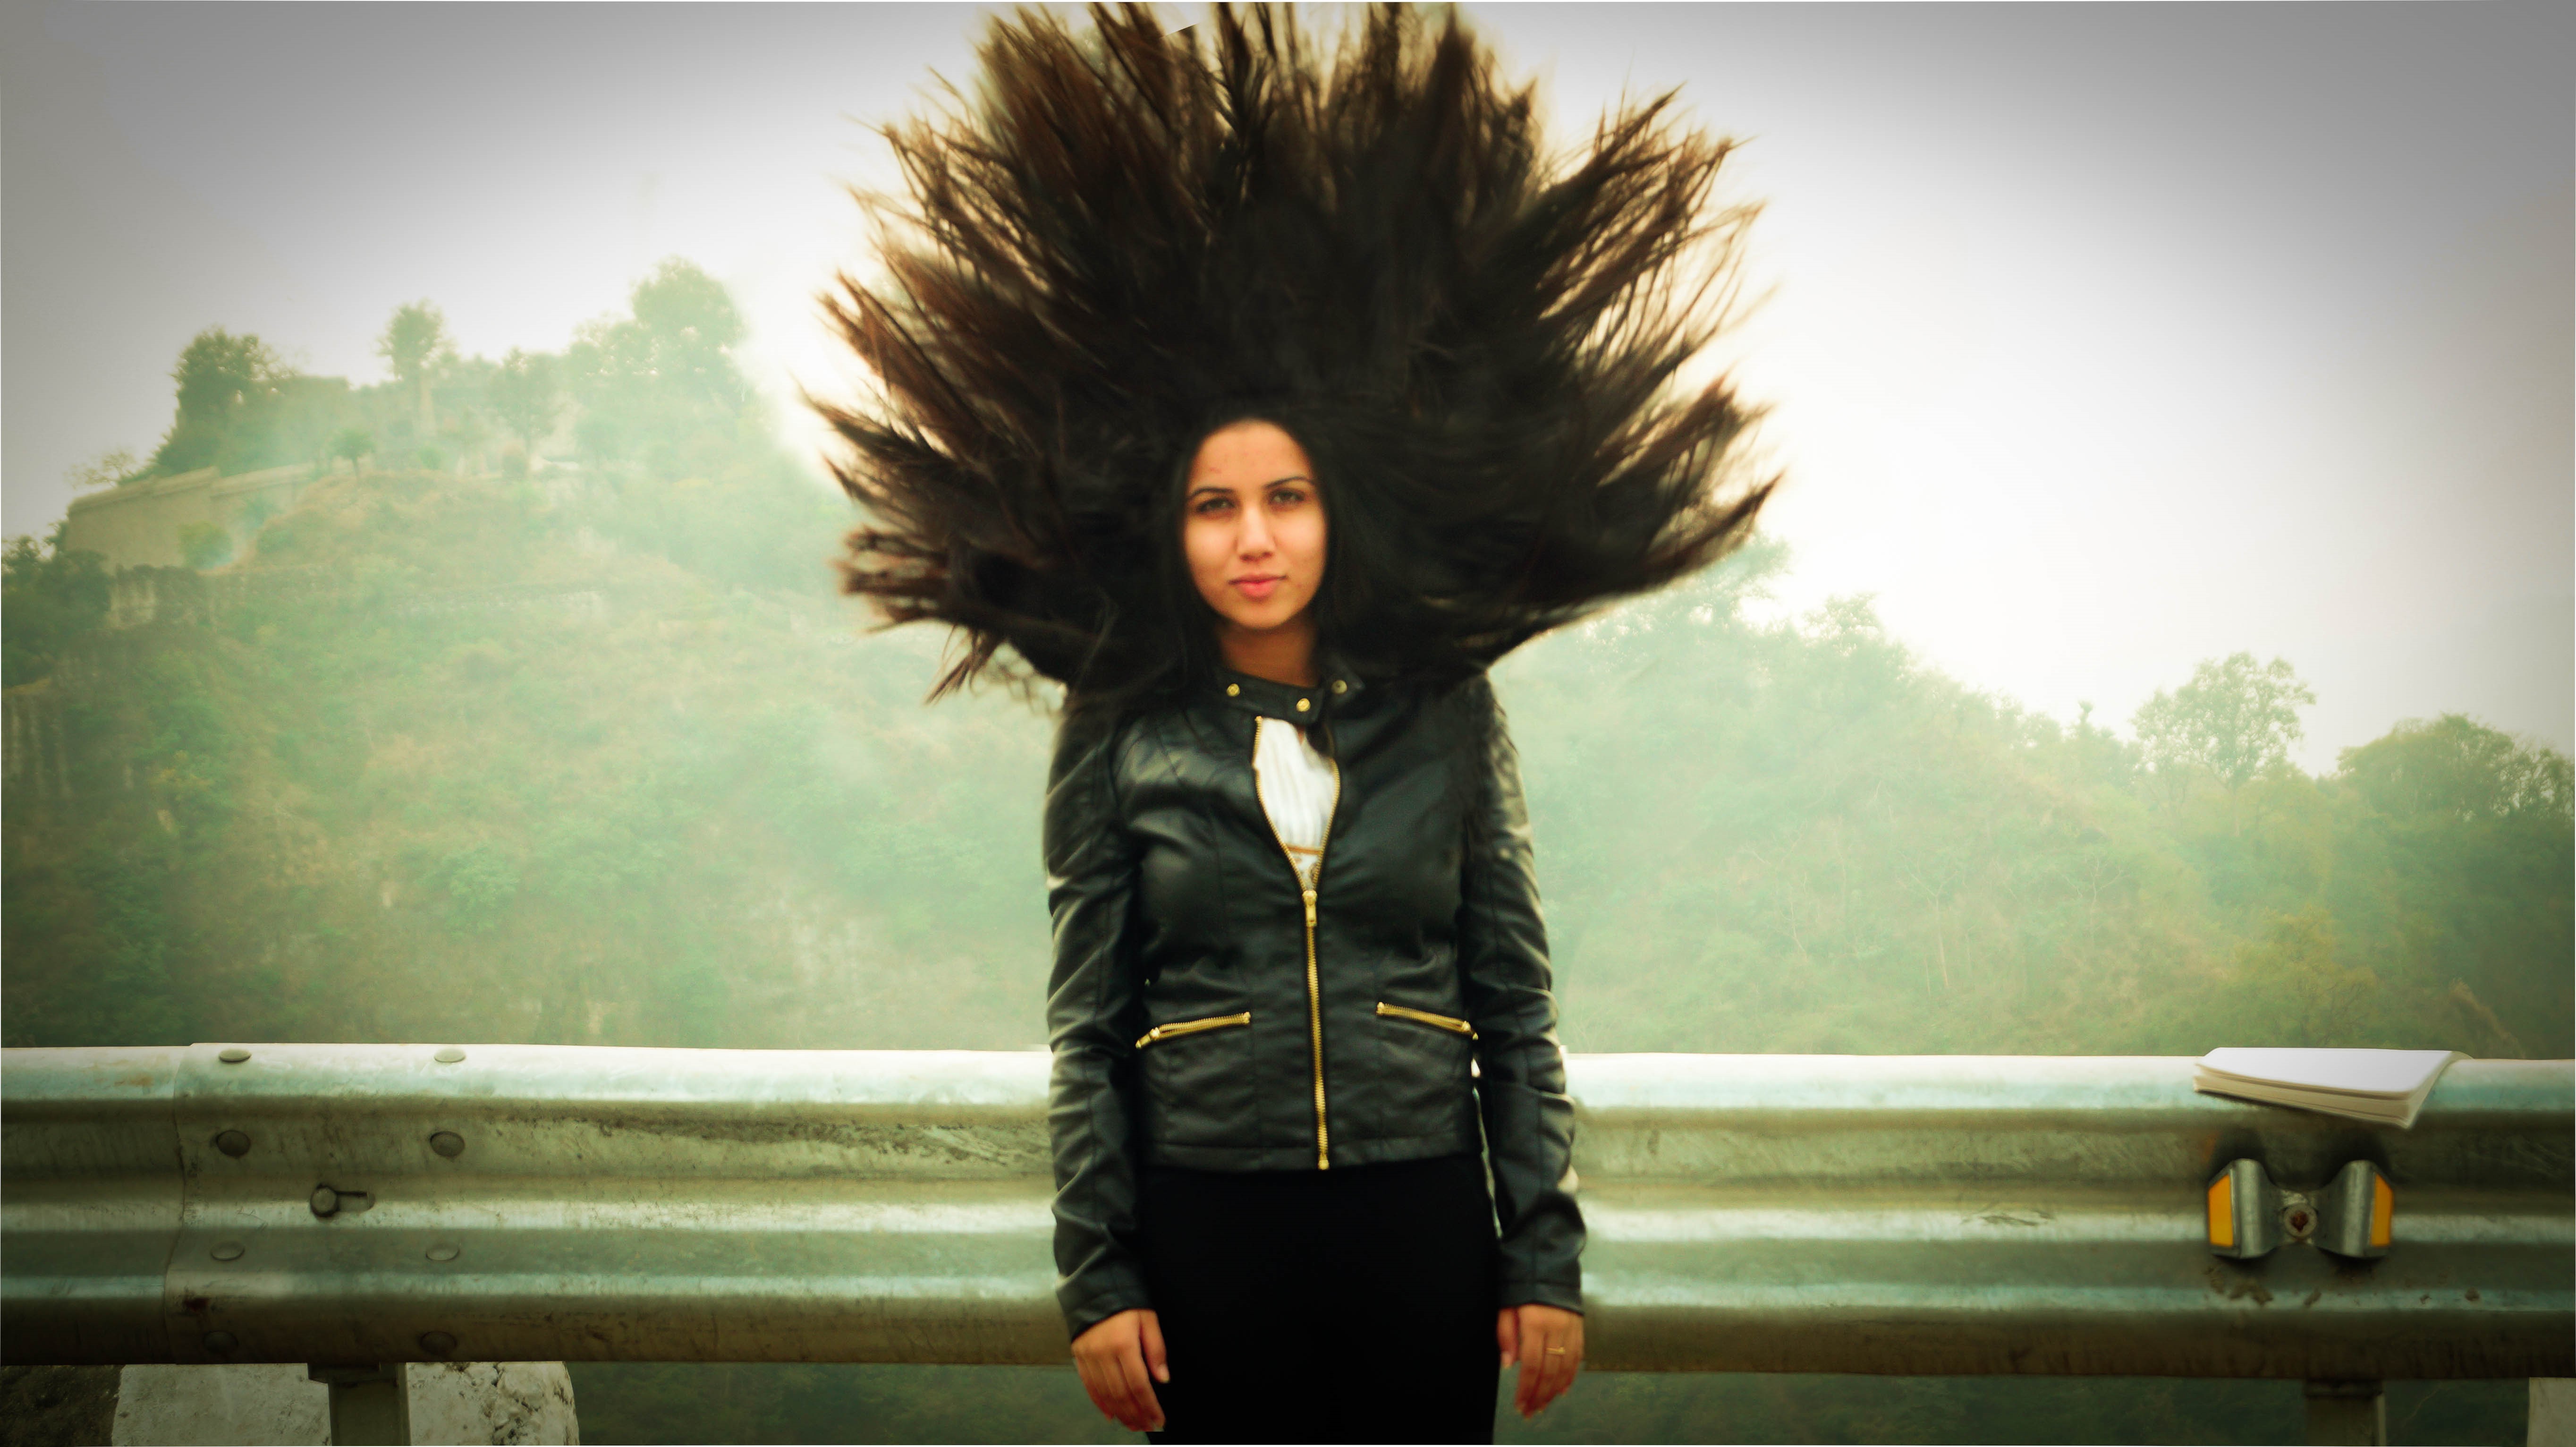
Now comes the last one.Take a picture with the kind of expression you’d want your model to have in the final picture. Also, make sure the arms are resting in this image as you’d have to blend in the resting arms and the face from this picture into the above picture.
IMAGE B
The Post Processing Process
Step 1:
Select the images you’ll be using for the final image. Add a “Mask” to all the layers one by one and press “Ctrl” + “I” to invert the mask. Set the Brush shape to Round, Hardness to 0, and Opacity to about 96%.Set the colour to White and carefully select the hair you’d want to include in the picture.(NOTE : This step is most important. It took me nearly 12 hours to get this right. Also I’d advise you to use “Clone Stamp” and “Burn Tool” to fill in any blank space between the hair and darken the hair ends.)
Step 2:
Blending.
Now using the images A and B, Construct the final image using the same process by selecting using masking.
NOTE: I also modified the colours using the Adobe Lightroom, you could do the same via Adobe Photoshop only. (play with Hue/Saturation, Colour Levels, Brightness/Contrast, Vignetting) or any other software like Picasa, or even the ones on your phone will work. (Again, not exaggerating!)
Step 3:
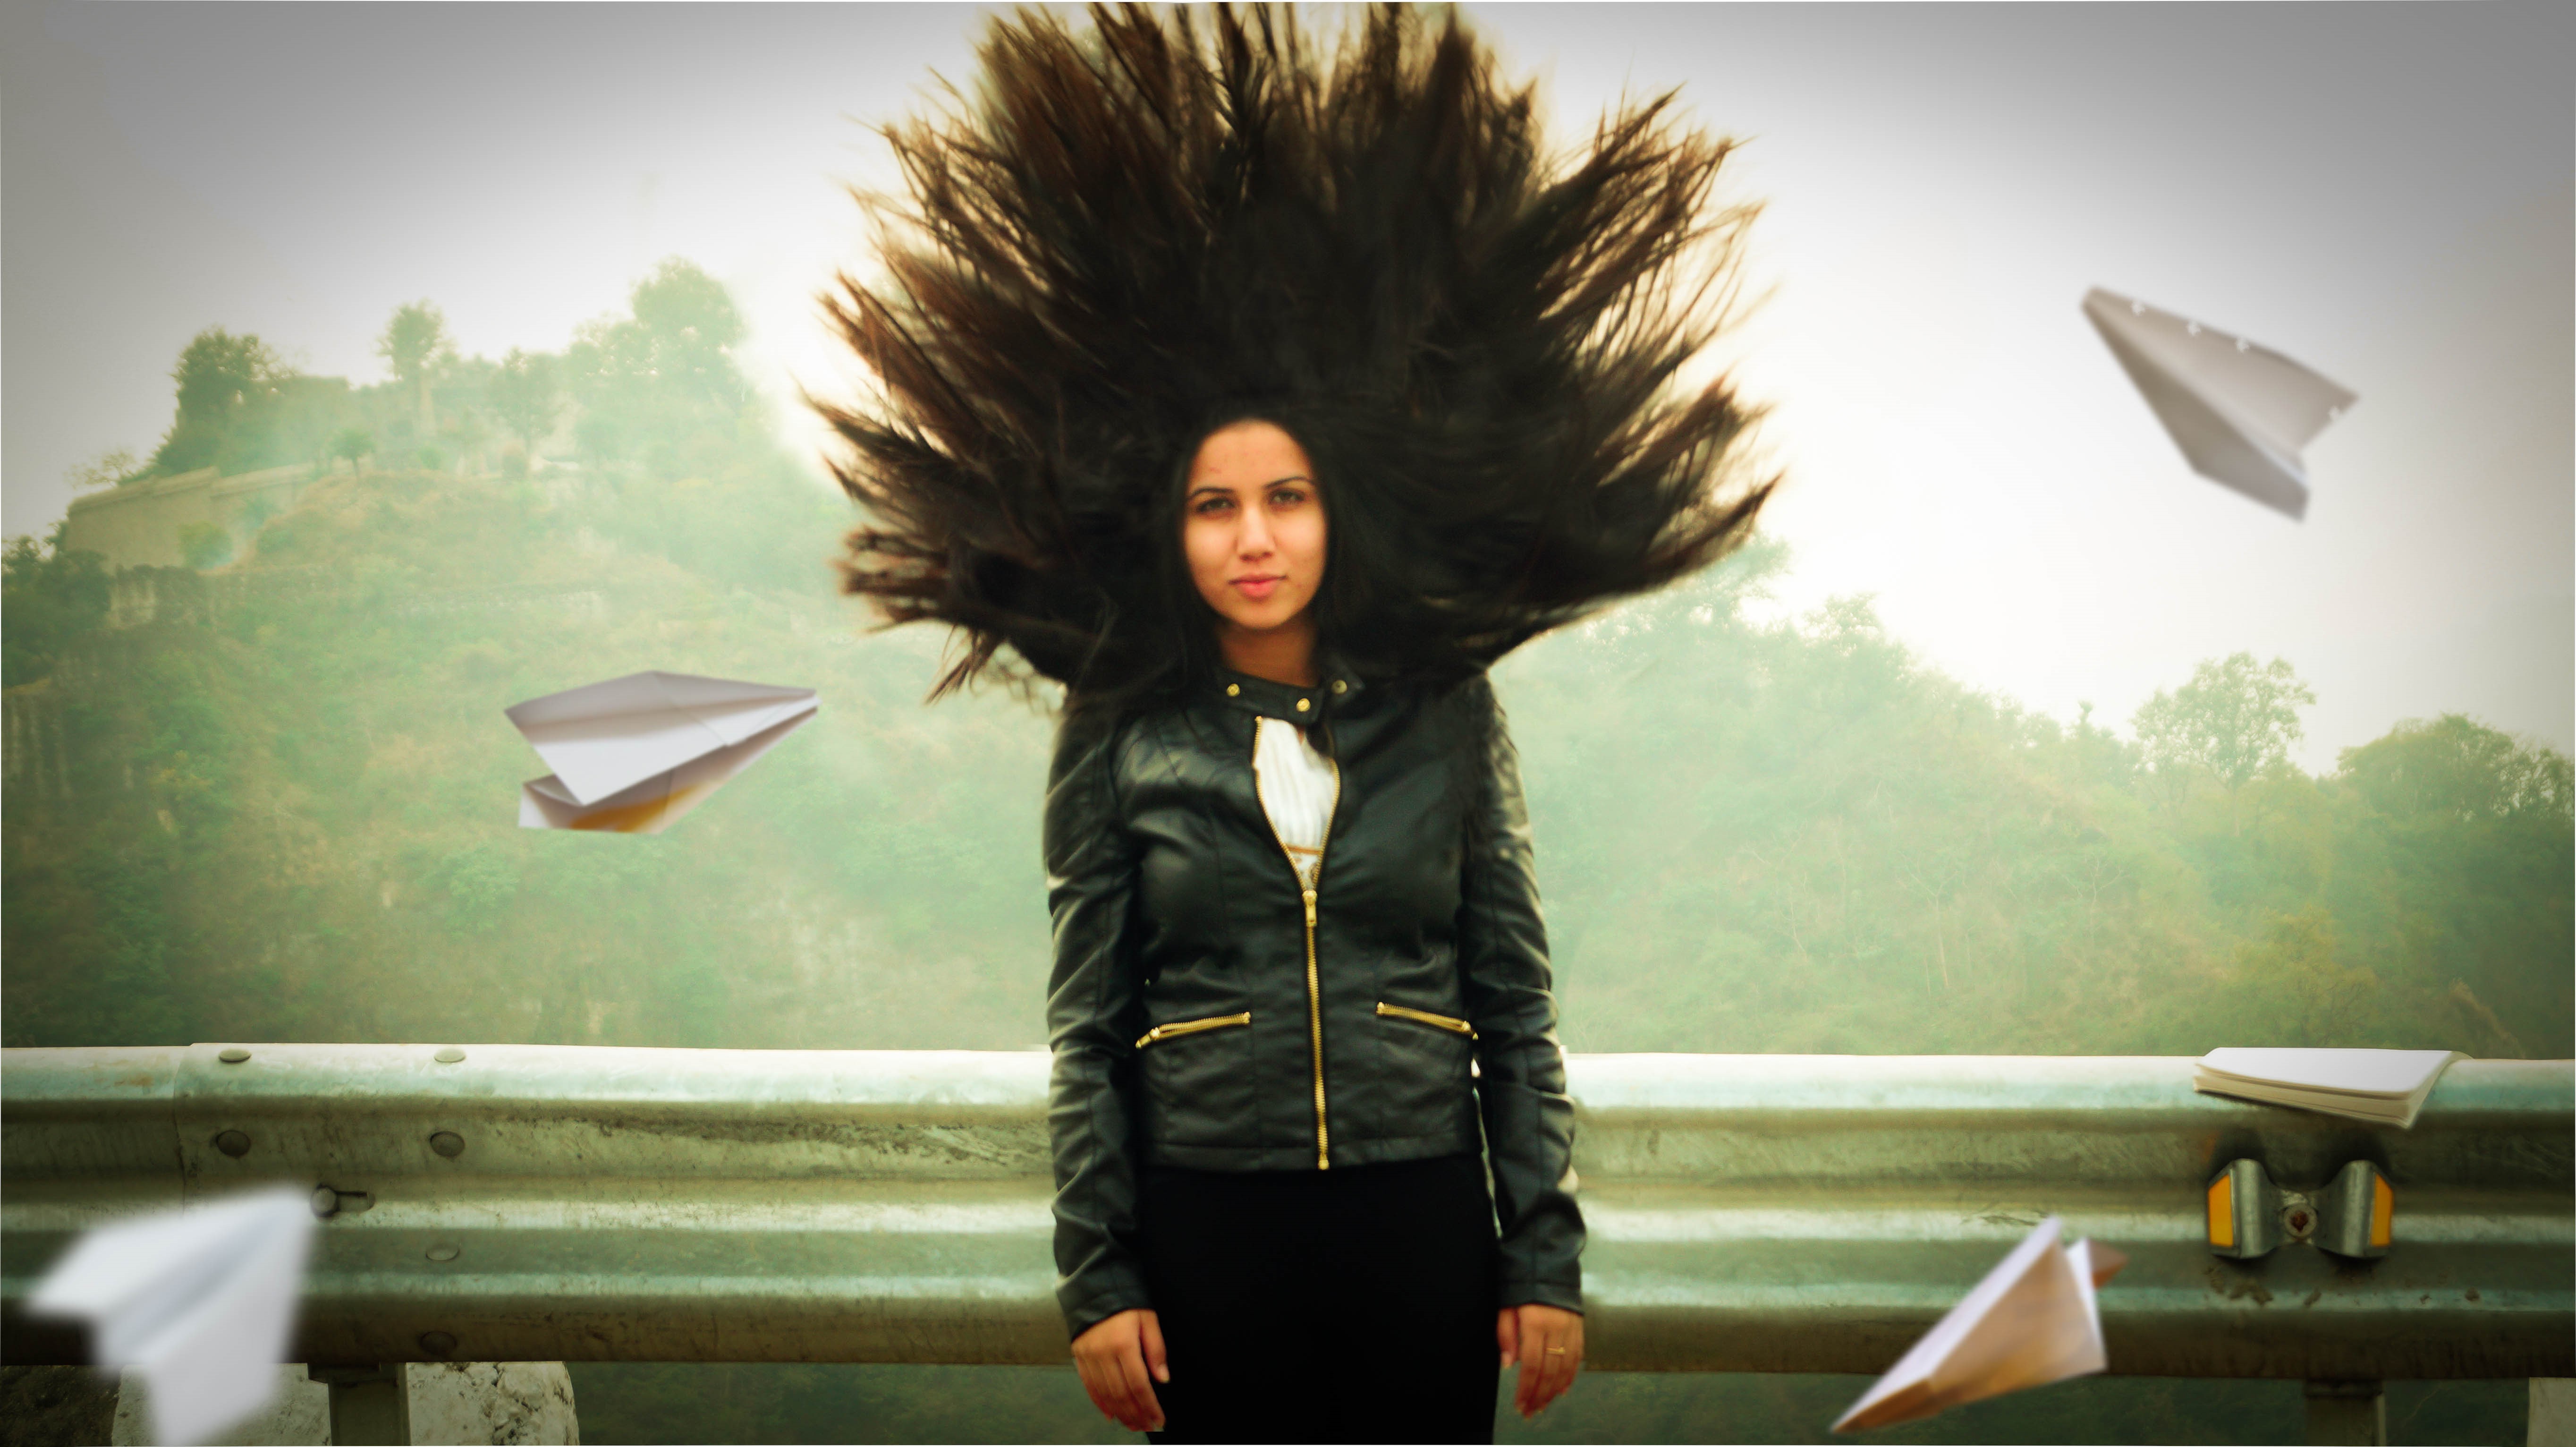
Adding Planes.
Google something like “Paper Plane png”. .Png images are already extracted images i.e you’d not need to extract the objects from the background (I usually use deviantart.com for this). Put the planes in the desired positions and brush them a little brown to give them a “Burnt paper” like effect.
Step 4:
Creating Depth of Field.
To make the picture more real, you’d need to add depth of field to it. The planes closer to the camera need to be more blurred than the ones near the subject. To attain this, select the plane layer and go to Filter>Blur>Gaussian Blur. Select the radius to the desired value, more the radius, more the blur and the closer the plane layer will appear to the camera. Do this for all the planes and you should get something like this.
Step 5:
Adding Fire.
Search again for the png images of fire and you’ll mostly get something with black backgrounds. To remove the black background, select the layer type from “Normal” to “Screen” and the black should go away now. Place those fire “layers” on the planes now and blur them a little by using the process explained above.
0 comments:
Post a Comment